
 Posted By
Bajarangi soft ,
Posted On 18-09-2020
Posted By
Bajarangi soft ,
Posted On 18-09-2020
Routing
Laravel's laravel/ui package provides a quick way to scaffold all of the routes and views you need for authentication using a few simple commands:
composer require laravel/ui:^2.4

php artisan ui vue --auth
This command should be used on fresh applications and will install a layout view, registration and login views, as well as routes for all authentication end-points. A HomeController will also be generated to handle post-login requests to your application's dashboard.
The laravel/ui package also generates several pre-built authentication controllers, which are located in the App\Http\Controllers \Auth namespace. The RegisterController handles new user registration, the LoginController handles authentication, the Forgot PasswordController handles e-mailing links for resetting passwords, and the ResetPasswordController contains the logic to reset pass words. Each of these controllers uses a trait to include their necessary methods. For many applications, you will not need to modify these controllers at all.
If your application doesn’t need registration, you may disable it by removing the newly created RegisterController and modifying your route declaration: Auth::routes(['register' => false]);.
Creating Applications Including Authentication
If you are starting a brand new application and would like to include the authentication scaffolding, you may use the --auth directive when creating your application. This command will create a new application with all of the authentication scaffolding compiled and installed:
laravel new blog --auth
Views
As mentioned in the previous section, the laravel/ui package's php artisan ui vue --auth command will create all of the views you need for authentication and place them in the resources/views/auth directory.
The ui command will also create a resources/views/layouts directory containing a base layout for your application. All of these views use the Bootstrap CSS framework, but you are free to customize them however you wish.
Authenticating
Now that you have routes and views setup for the included authentication controllers, you are ready to register and authenticate new users for your application! You may access your application in a browser since the authentication controllers already contain the logic (via their traits) to authenticate existing users and store new users in the database.
Path Customization
When a user is successfully authenticated, they will be redirected to the /home URI. You can customize the post-authentication redirect path using the HOME constant defined in your RouteServiceProvider:
public const HOME = '/home';
If you need more robust customization of the response returned when a user is authenticated, Laravel provides an empty authenticated(Request $request, $user) method within the AuthenticatesUsers trait. This trait is used by the LoginController class that is installed into your application when using the laravel/ui package. Therefore, you can define your own authenticated method within the LoginController class:
/**
 * The user has been authenticated.
 *
 * @param  \Illuminate\Http\Request  $request
 * @param  mixed  $user
 * @return mixed
 */
protected function authenticated(Request $request, $user)
{
    return response([
        //
    ]);
}
Username Customization
By default, Laravel uses the email field for authentication. If you would like to customize this, you may define a username method on your LoginController:
public function username()
{
    return 'username';
}
Guard Customization
You may also customize the "guard" that is used to authenticate and register users. To get started, define a guard method on your LoginController, RegisterController, and ResetPasswordController. The method should return a guard instance:
use Illuminate\Support\Facades\Auth;

protected function guard()
{
    return Auth::guard('guard-name');
}
Validation / Storage Customization
To modify the form fields that are required when a new user registers with your application, or to customize how new users are stored into your database, you may modify the RegisterController class. This class is responsible for validating and creating new users of your application.
The validator method of the RegisterController contains the validation rules for new users of the application. You are free to modify this method as you wish.
The create method of the RegisterController is responsible for creating new App\User records in your database using the Eloquent ORM. You are free to modify this method according to the needs of your database.
Retrieving The Authenticated User
You may access the authenticated user via the Auth facade:
use Illuminate\Support\Facades\Auth;

// Get the currently authenticated user...
$user = Auth::user();

// Get the currently authenticated user's ID...
$id = Auth::id();
Alternatively, once a user is authenticated, you may access the authenticated user via an Illuminate\Http\Request instance. Remember, type-hinted classes will automatically be injected into your controller methods:
namespace App\Http\Controllers;

use Illuminate\Http\Request;

class ProfileController extends Controller
{
    /**
     * Update the user's profile.
     *
     * @param Request $request
     * @return Response
     */
    public function update(Request $request)
    {
        // $request->user() returns an instance of the authenticated user...
    }
}
Determining If The Current User Is Authenticated
To determine if the user is already logged into your application, you may use the check method on the Auth facade, which will return true if the user is authenticated:
use Illuminate\Support\Facades\Auth;

if (Auth::check()) {
    // The user is logged in...
}
Protecting Routes
Route middleware can be used to only allow authenticated users to access a given route. Laravel ships with an auth middleware, which is defined at Illuminate\Auth\Middleware\Authenticate. Since this middleware is already registered in your HTTP kernel, all you need to do is attach the middleware to a route definition:
Route::get('profile', function () {
    // Only authenticated users may enter...
})->middleware('auth');
If you are using controllers, you may call the middleware method from the controller's constructor instead of attaching it in the route definition directly:
public function __construct()
{
$this->middleware('auth');
}
Redirecting Unauthenticated Users
When the auth middleware detects an unauthorized user, it will redirect the user to the login named route. You may modify this behavior by updating the redirectTo function in your app/Http/Middleware/Authenticate.php file:
/**
 * Get the path the user should be redirected to.
 *
 * @param  \Illuminate\Http\Request  $request
 * @return string
 */
protected function redirectTo($request)
{
    return route('login');
}
Password Confirmation
Sometimes, you may wish to require the user to confirm their password before accessing a specific area of your application. For example, you may require this before the user modifies any billing settings within the application.
To accomplish this, Laravel provides a password.confirm middleware. Attaching the password.confirm middleware to a route will redirect users to a screen where they need to confirm their password before they can continue:
Route::get('/settings/security', function () {
// Users must confirm their password before continuing...
})->middleware(['auth', 'password.confirm']);
After the user has successfully confirmed their password, the user is redirected to the route they originally tried to access. By default, after confirming their password, the user will not have to confirm their password again for three hours. You are free to customize the length of time before the user must re-confirm their password using the auth.password_timeout configuration option.
Login Throttling
If you are using Laravel's built-in LoginController class, the Illuminate\Foundation\Auth\ThrottlesLogins trait will already be included in your controller. By default, the user will not be able to login for one minute if they fail to provide the correct credentials after several attempts. The throttling is unique to the user's username / e-mail address and their IP address.
For Example(1)
1.Create new laravel project using below command
composer create-project --prefer-dist laravel/laravel blog
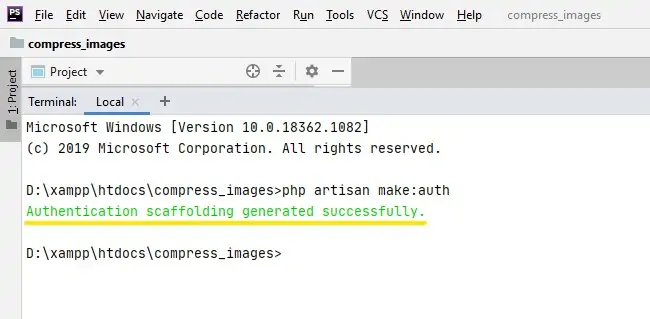
2.After laravel project installed use below command to create forms and the associated controllers to perform authentication
php artisan make:auth
3.Now open app\Http\Controller\HomeController.php and you can see authentication process created in it
<?php

namespace App\Http\Controllers;

use Illuminate\Http\Request;

class HomeController extends Controller
{
    /**
     * Create a new controller instance.
     *
     * @return void
     */
    public function __construct()
    {
        $this->middleware('auth');
    }

    /**
     * Show the application dashboard.
     *
     * @return \Illuminate\Contracts\Support\Renderable
     */
    public function index()
    {
        return view('home');
    }
}
http://localhost/blog/public/login