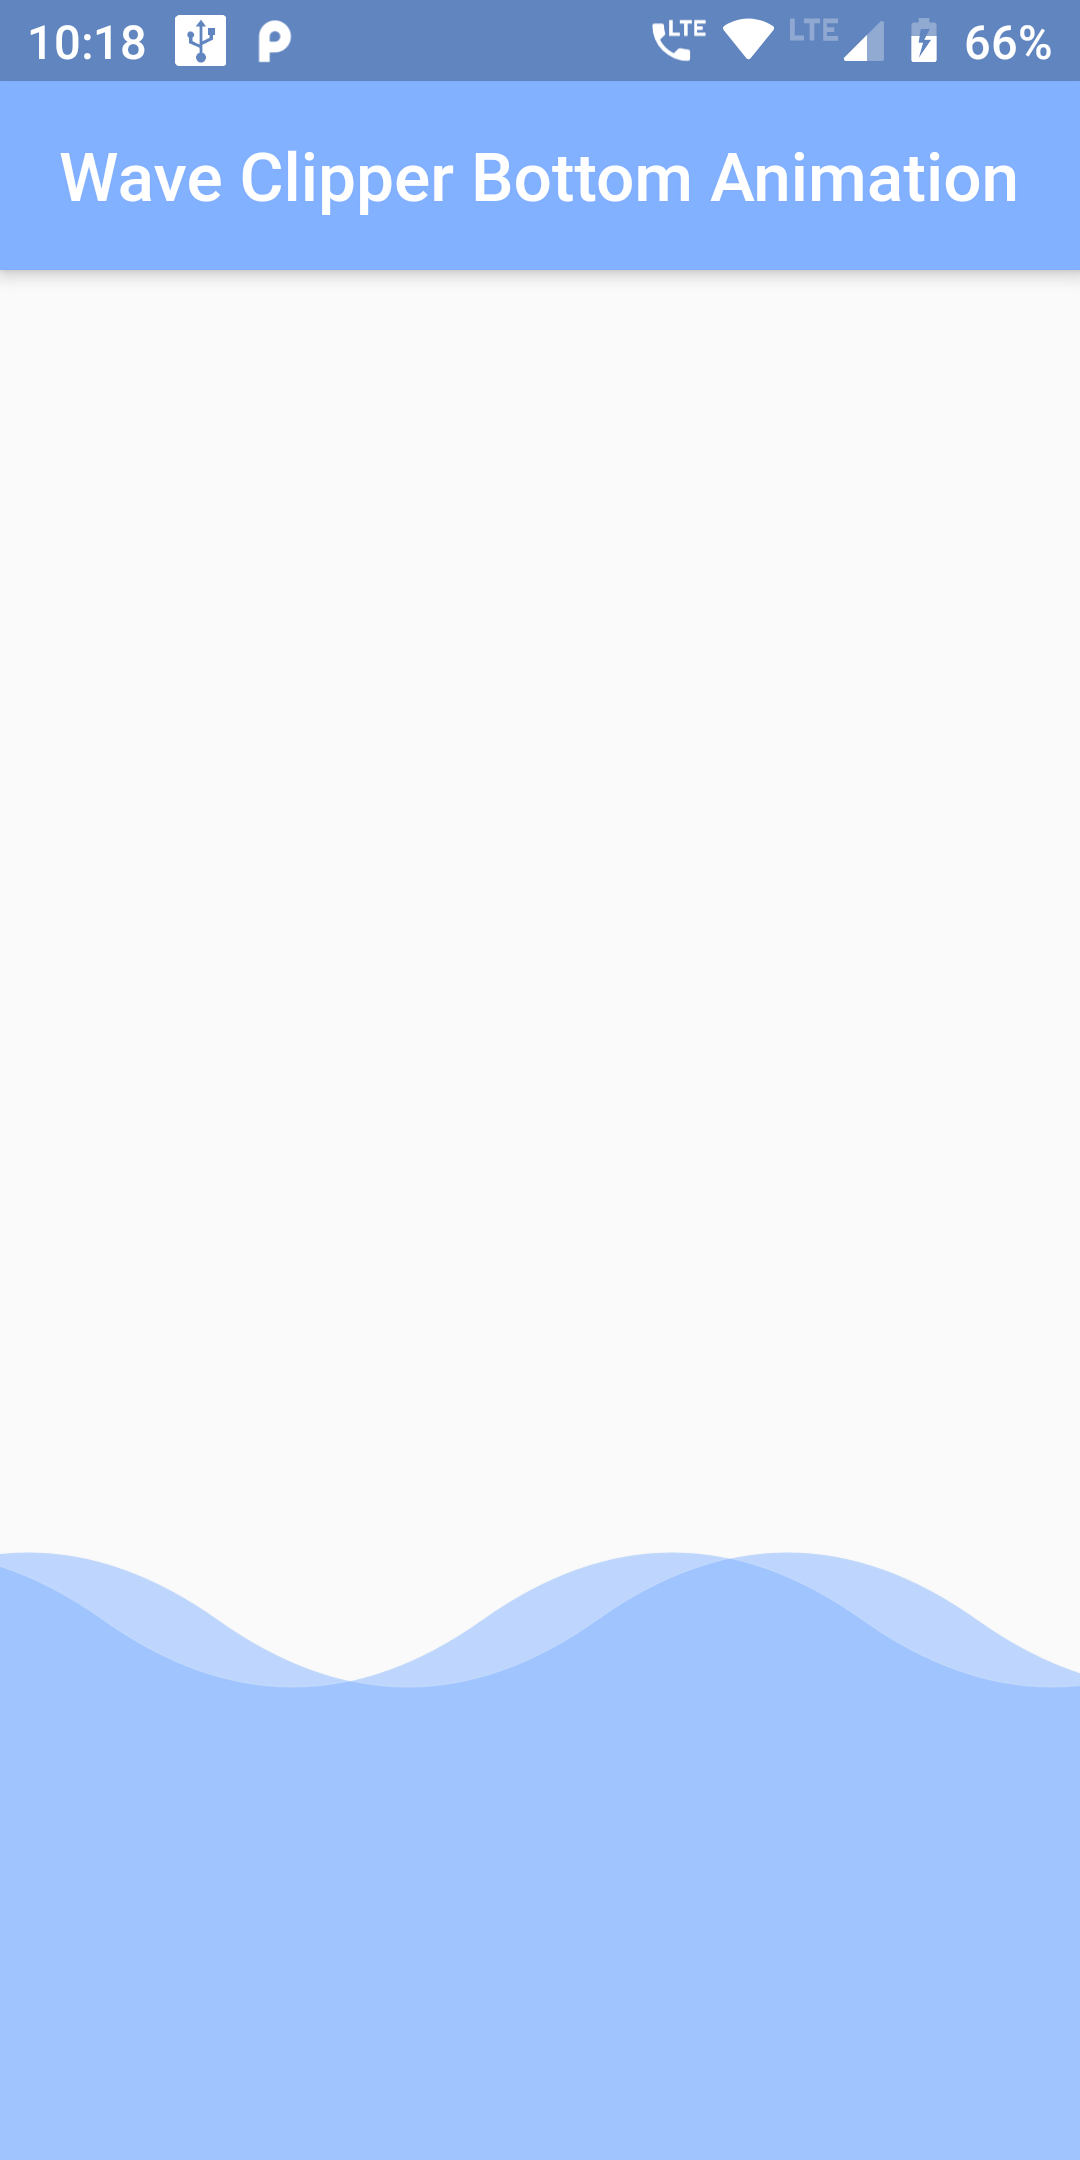
Wave Curved Clipper Bottom Animation
You Can Add Wave Curved Clipper Animation Code:
Container(
  child: Stack(
      children: [
        Positioned(
          bottom:0,
          right: animation.value,
          child: ClipPath(
            clipper: MyWaveClipper(),
            child: Opacity(
              opacity: 0.5,
              child: Container(
                color: Colors.blueAccent[100],
                width: 900,
                height: 200,
              ),
            ),
          ),
        ),

        Positioned(
          bottom:0,
          left: animation.value, //value of left from animation controller
          child: ClipPath(
            clipper: MyWaveClipper(), //applying our custom clipper
            child: Opacity(
              opacity: 0.5,
              child: Container(
                color: Colors.blueAccent[100],
                width:900,
                height: 200,
              ),
            ),
          ),
        ),
      ]),
),
class MyWaveClipper extends CustomClipper<Path> {
  @override
  Path getClip(Size size) {
    var path = new Path();
    path.lineTo(0.0, 40.0);
    path.lineTo(0.0, size.height);
    path.lineTo(size.width, size.height);
    path.lineTo(size.width, 40.0);


    for (int i = 0; i < 10; i++) {
      if (i % 2 == 0) {
        path.quadraticBezierTo(
            size.width - (size.width / 16) - (i * size.width / 8),
            0.0,
            size.width - ((i + 1) * size.width / 8),
            size.height - 160);
      } else {
        path.quadraticBezierTo(
            size.width - (size.width / 16) - (i * size.width / 8),
            size.height - 120,
            size.width - ((i + 1) * size.width / 8),
            size.height - 160);
      }
    }

    path.lineTo(0.0, 40.0);
    path.close();
    return path;
  }

  @override
  bool shouldReclip(CustomClipper<Path> oldClipper) {
    return false;
  }
}
import 'package:flutter/material.dart';

void main()=> runApp(MyApp());

class MyApp extends StatelessWidget {
  @override
  Widget build(BuildContext context) {
    return MaterialApp(
      debugShowCheckedModeBanner: false,
      title: "My App",
      home: MyAnimatedWaveCurves(),
    );
  }
}


class MyAnimatedWaveCurves extends StatefulWidget{
  @override
  State<StatefulWidget> createState() {
    return _MyAnimatedWavesCurves();
  }
}

class _MyAnimatedWavesCurves extends State<MyAnimatedWaveCurves> with SingleTickerProviderStateMixin {
  //use "with SingleThickerProviderStateMixin" at last of class declaration
  //where you have to pass "vsync" argument, add this

  Animation<double> animation;
  AnimationController _controller; //controller for animation

  @override
  void initState() {
    super.initState();
    _controller = AnimationController(duration: Duration(seconds: 4), vsync: this);
    _controller.repeat();
    //we set animation duration, and repeat for infinity

    animation = Tween<double>(begin: -400, end: 0).animate(_controller);
    //we have set begin to -600 and end to 0, it will provide the value for
    //left or right position for Positioned() widget to creat movement from left to right
    animation.addListener(() {
      setState(() {}); //update UI on every animation value update
    });
  }

  @override
  void dispose() {
    super.dispose();
    _controller.dispose(); //destory anmiation to free memory on last
  }


  @override
  Widget build(BuildContext context) {
    return Scaffold(
      appBar: AppBar(
          centerTitle: true,
          title:Text("Wave Clipper Bottom Animation"),
          backgroundColor: Colors.blueAccent[100]
      ),
      body: Container(
        child: Stack(
            children: [
              Positioned(
                bottom:0,
                right: animation.value,
                child: ClipPath(
                  clipper: MyWaveClipper(), //applying our custom clipper
                  child: Opacity(
                    opacity: 0.5,
                    child: Container(
                      color: Colors.blueAccent[100],
                      width: 900,
                      height: 200,
                    ),
                  ),
                ),
              ),

              Positioned(
                bottom:0,
                left: animation.value, //value of left from animation controller
                child: ClipPath(
                  clipper: MyWaveClipper(), //applying our custom clipper
                  child: Opacity(
                    opacity: 0.5,
                    child: Container(
                      color: Colors.blueAccent[100],
                      width:900,
                      height: 200,
                    ),
                  ),
                ),
              ),
            ]),
      ),
    );
  }
}


class MyWaveClipper extends CustomClipper<Path> {
  @override
  Path getClip(Size size) {
    var path = new Path();
    path.lineTo(0.0, 40.0);
    path.lineTo(0.0, size.height);
    path.lineTo(size.width, size.height);
    path.lineTo(size.width, 40.0);


    for (int i = 0; i < 10; i++) {
      if (i % 2 == 0) {
        path.quadraticBezierTo(
            size.width - (size.width / 16) - (i * size.width / 8),
            0.0,
            size.width - ((i + 1) * size.width / 8),
            size.height - 160);
      } else {
        path.quadraticBezierTo(
            size.width - (size.width / 16) - (i * size.width / 8),
            size.height - 120,
            size.width - ((i + 1) * size.width / 8),
            size.height - 160);
      }
    }

    path.lineTo(0.0, 40.0);
    path.close();
    return path;
  }

  @override
  bool shouldReclip(CustomClipper<Path> oldClipper) {
    return false;
  }
}