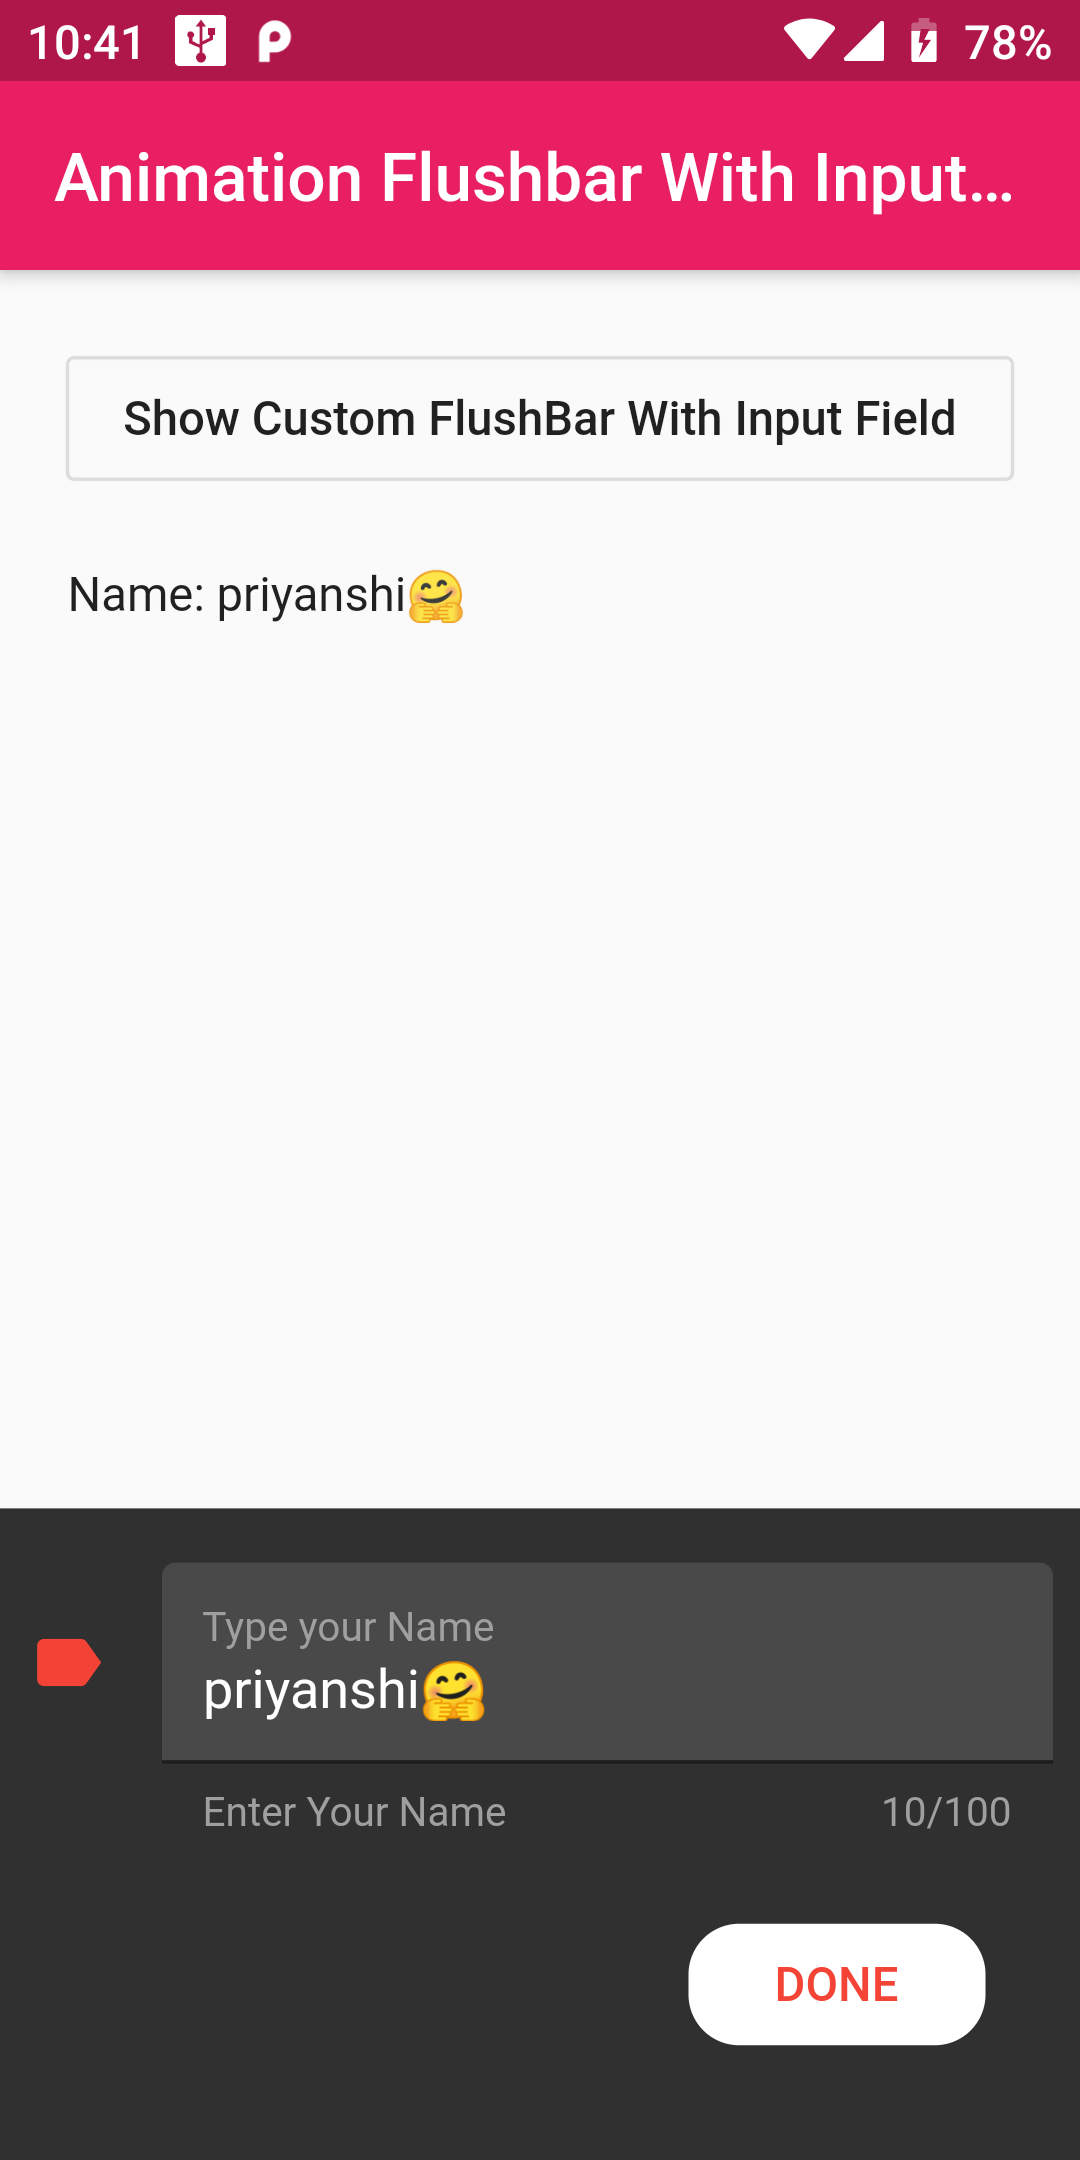
Animation Flushbar With Input Field
Step 1:
We cannot directly remove the time stamp from Animation Flushbar With Input Field but using the intl.dart package we can easily filter the date stamp from time stamp. So open your flutter project’s pubspec.yaml in code
dependencies:
  flutter:
    sdk: flutter
  flushbar: ^1.10.4
flutter pub get
import 'package:flushbar/flushbar.dart';
TextEditingController _controller = TextEditingController();
Flushbar<List<String>> flushbar2;
final GlobalKey<FormState> _formKey = GlobalKey<FormState>();
Form userInputForm;
String inputVal = '';

TextFormField getFormField() {
  return TextFormField(
    controller: _controller,
    initialValue: null,
    style: TextStyle(color: Colors.white),
    maxLength: 100,
    maxLines: 1,
    decoration: InputDecoration(
      fillColor: Colors.white12,
      filled: true,
      icon: Icon(
        Icons.label,
        color: Colors.red,
      ),
      border: UnderlineInputBorder(),
      helperText: 'Enter Your Name',
      helperStyle: TextStyle(color: Colors.grey),
      labelText: 'Type your Name',
      labelStyle: TextStyle(color: Colors.grey),
    ),
  );
}

withInputField(BuildContext context) async {
  flushbar2 = Flushbar<List<String>>(
    flushbarPosition: FlushbarPosition.BOTTOM,
    flushbarStyle: FlushbarStyle.GROUNDED,
    reverseAnimationCurve: Curves.decelerate,
    forwardAnimationCurve: Curves.elasticIn,
    userInputForm: Form(
      key: _formKey,
      child: Column(
        mainAxisSize: MainAxisSize.min,
        crossAxisAlignment: CrossAxisAlignment.center,
        children: <Widget>[
          getFormField(),
          Align(
            alignment: Alignment.bottomRight,
            child: Padding(
              padding: EdgeInsets.all(20.0),
              child: FlatButton(
                child: Text('DONE'),
                shape: RoundedRectangleBorder(
                  borderRadius: BorderRadius.circular(15.0),
                ),
                color: Colors.white,
                textColor: Colors.red,
                padding: EdgeInsets.all(6.0),
                onPressed: () {
                  flushbar2.dismiss([ 'Name: ',_controller.text]);
                },
              ),
            ),
          ),
        ],
      ),
    ),
  )..show(context).then((result) {
    if (null != result) {
      String userInput1 = result[0];
      String userInput2 = result[1];
      setState(() {
        inputVal = userInput1 + userInput2;
      });
    }
  });
}
import 'package:flutter/material.dart';
import 'package:flushbar/flushbar.dart';

void main() {
  runApp(MyApp());
}
class MyApp extends StatelessWidget {
  // This widget is the root of your application.
  @override
  Widget build(BuildContext context) {
    return MaterialApp(
      title: 'Flutter FlushBar Example ',
      debugShowCheckedModeBanner: false,
      home: Scaffold(
        appBar: AppBar(
          centerTitle: true,
          backgroundColor: Colors.pink,
          title: Text('Animation Flushbar With Input Field '),
        ),
        body: AnimationFlushBar(),
      ),
    );
  }
}
class AnimationFlushBar extends StatefulWidget {
  final String title = "FlushBar Demo";
  @override
  AnimationFlushBarState createState() => AnimationFlushBarState();
}

class AnimationFlushBarState extends State<AnimationFlushBar> {
  Flushbar flushbar;

  //
  TextEditingController _controller = TextEditingController();
  Flushbar<List<String>> flushbar2;
  final GlobalKey<FormState> _formKey = GlobalKey<FormState>();
  Form userInputForm;
  String inputVal = '';

  TextFormField getFormField() {
    return TextFormField(
      controller: _controller,
      initialValue: null,
      style: TextStyle(color: Colors.white),
      maxLength: 100,
      maxLines: 1,
      decoration: InputDecoration(
        fillColor: Colors.white,
        filled: true,
        icon: Icon(
          Icons.label,
          color: Colors.red,
        ),
        border: UnderlineInputBorder(),
        helperText: 'Enter Your Name',
        helperStyle: TextStyle(color: Colors.grey),
        labelText: 'Type your Name',
        labelStyle: TextStyle(color: Colors.grey),
      ),
    );
  }

  withInputField(BuildContext context) async {
    flushbar2 = Flushbar<List<String>>(
      flushbarPosition: FlushbarPosition.BOTTOM,
      flushbarStyle: FlushbarStyle.GROUNDED,
      reverseAnimationCurve: Curves.decelerate,
      forwardAnimationCurve: Curves.elasticIn,
      userInputForm: Form(
        key: _formKey,
        child: Column(
          mainAxisSize: MainAxisSize.min,
          crossAxisAlignment: CrossAxisAlignment.center,
          children: <Widget>[
            getFormField(),
            Align(
              alignment: Alignment.bottomRight,
              child: Padding(
                padding: EdgeInsets.all(20.0),
                child: FlatButton(
                  child: Text('DONE'),
                  shape: RoundedRectangleBorder(
                    borderRadius: BorderRadius.circular(15.0),
                  ),
                  color: Colors.white,
                  textColor: Colors.red,
                  padding: EdgeInsets.all(6.0),
                  onPressed: () {
                    flushbar2.dismiss([ 'Name: ',_controller.text]);
                  },
                ),
              ),
            ),
          ],
        ),
      ),
    )..show(context).then((result) {
      if (null != result) {
        String userInput1 = result[0];
        String userInput2 = result[1];
        setState(() {
          inputVal = userInput1 + userInput2;
        });
      }
    });
  }


  @override
  Widget build(BuildContext context) {
    return Scaffold(
      body: Container(
        padding: EdgeInsets.all(20.0),
        child: Column(
          mainAxisAlignment: MainAxisAlignment.start,
          crossAxisAlignment: CrossAxisAlignment.stretch,
          children: <Widget>[
            OutlineButton(
              child: Text('Show Custom FlushBar With Input Field'),
              onPressed: () {
                withInputField(context);
              },
            ),
           SizedBox(height: 20.0,),
            Text(inputVal)
          ],
        ),
      ),
    );
  }
}