
 Posted By
Bajarangi soft ,
Posted On 10-09-2020
Posted By
Bajarangi soft ,
Posted On 10-09-2020
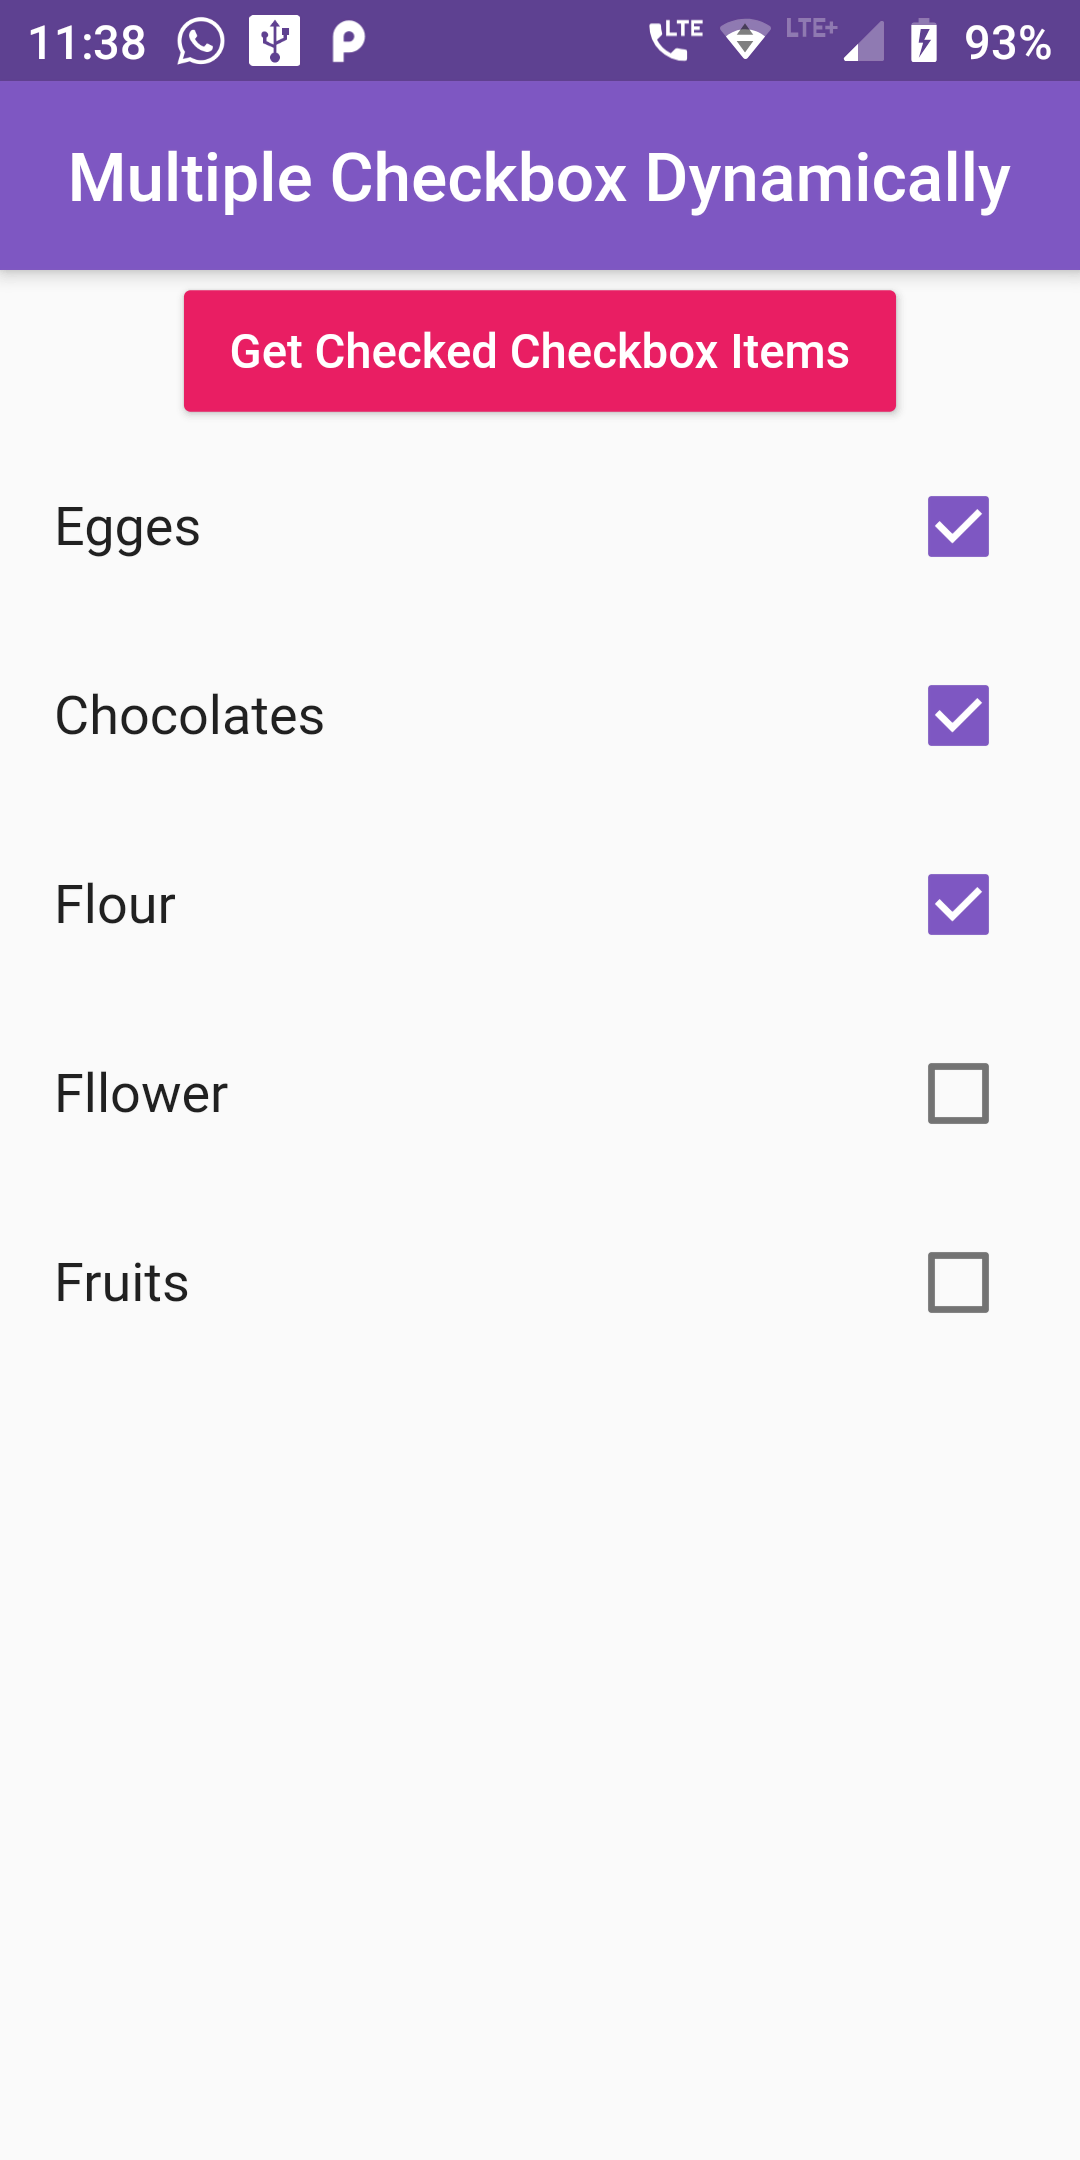
Complete Code For Multiple CheckBox Dynamically In Flutter
main.dart
import 'package:flutter/material.dart';

void main() => runApp(MyApp());

class MyApp extends StatelessWidget {
  @override
  Widget build(BuildContext context) {
    return MaterialApp(
      debugShowCheckedModeBanner: false,
      home: Scaffold(
          appBar: AppBar(
            centerTitle: true,
            backgroundColor: Colors.deepPurple[400],
            title: Text("Multiple Checkbox Dynamically"),
          ),
          body: SafeArea(
              child : Center(
                child:DynamicallyCheckbox(),
              )
          )
      ),
    );
  }
}

class DynamicallyCheckbox extends StatefulWidget {
  @override
  DynamicallyCheckboxState createState() => new DynamicallyCheckboxState();
}

class DynamicallyCheckboxState extends State {

  Map<String, bool> List = {
    'Egges' : false,
    'Chocolates' : false,
    'Flour' : false,
    'Fllower' : false,
    'Fruits' : false,
  };

  var holder_1 = [];


  getItems(){

    List.forEach((key, value) {
      if(value == true)
      {
        holder_1.add(key);
      }
    });

    // Printing all selected items on Terminal screen.
    print(holder_1);
    // Here you will get all your selected Checkbox items.

    // Clear array after use.
    holder_1.clear();
  }

  @override
  Widget build(BuildContext context) {
    return Column (children: <Widget>[

      RaisedButton(
        child: Text(" Get Checked Checkbox Items "),
        onPressed: getItems,
        color: Colors.pink,
        textColor: Colors.white,
        splashColor: Colors.grey,
        padding: EdgeInsets.fromLTRB(10, 10, 10, 10),
      ),

      Expanded(
        child :
        ListView(
          children: List.keys.map((String key) {
            return new CheckboxListTile(
              title: new Text(key),
              value: List[key],
              activeColor: Colors.deepPurple[400],
              checkColor: Colors.white,
              onChanged: (bool value) {
                setState(() {
                  List[key] = value;
                });
              },
            );
          }).toList(),
        ),
      ),]);
  }
}