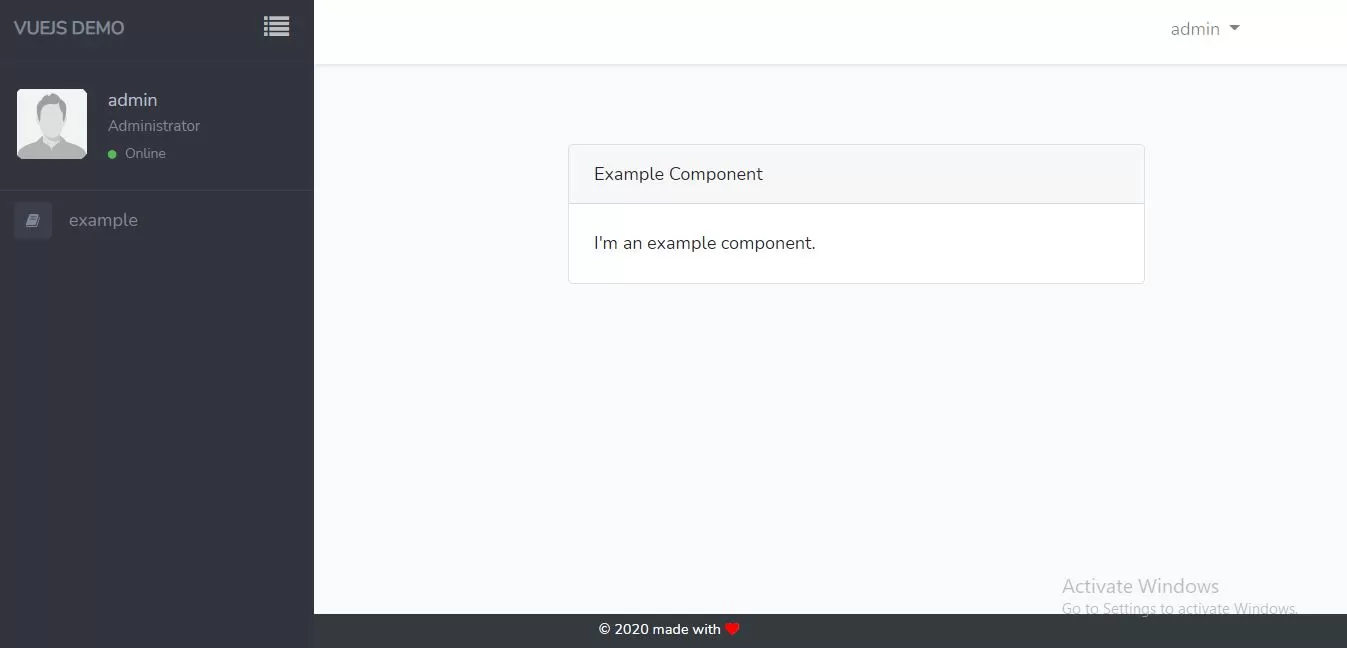
Let's learn
1.Install new laravel project to implement code. https://laravel.com/docs/5.8/installation
composer create-project --prefer-dist laravel/laravel blog
run above command in command prompt.
2.Install node.js package for blog project . click here to download it.
3.Install npm package for blog project.click here to see the documentation.Install the dependencies in the local node_modules folder.
npm install
run above command in terminal.
4.Now we create header.vue file in blog/resources/js/components folder and implement code as below.
header.vue
<template>
    <nav id="sidebar" class="sidebar-wrapper">
        <div class="sidebar-content">
            <div class="sidebar-brand">
                <a href="#">Vuejs demo</a>
                <div id="close-sidebar" @click="closemenu">
                    <i class="fa fa-list"></i>
                </div>
            </div>
            <div class="sidebar-header">
                <div class="user-pic">
                    <img class="img-responsive img-rounded" src="https://raw.githubusercontent.com/azouaoui-med/pro-sidebar-template/gh-pages/src/img/user.jpg" alt="User picture">
                </div>
                <div class="user-info">
          <span class="user-name">admin
          </span>
                    <span class="user-role">Administrator</span>
                    <span class="user-status">
            <i class="fa fa-circle"></i>
            <span>Online</span>
          </span>
                </div>
            </div>
            <!-- sidebar-header  -->

            <!-- sidebar-search  -->
            <div class="sidebar-menu">
                <ul>
                    <li>
                        <router-link to="/example"><i class="fa fa-book"></i>
                            <span>example</span></router-link>
                    </li>
                </ul>
            </div>
            <!-- sidebar-menu  -->
        </div>
        <!-- sidebar-content  -->

    </nav>
</template>

<script>
    export default {
        methods:{
            closemenu(){
                $(".page-wrapper").removeClass("toggled");
            }
        },

    }
</script>
<template>
    <footer class="text-center bg-dark">
        <div class="mb-2">
            <small class="text-white">
                © 2020 made with <i class="fa fa-heart" style="color:red"></i>
            </small>
        </div>


    </footer>
</template>
<style scoped>
    footer{
        position: fixed;
        bottom: 0;
        width: 100%;
    }
</style>
<template>
    <div class="container">
        <div class="row justify-content-center">
            <div class="col-md-8">
                <div class="card">
                    <div class="card-header">Example Component</div>
                    <div class="card-body">
                        I'm an example component.
                    </div>
                </div>
            </div>
        </div>
    </div>

</template>

<script>
    export default {
        mounted() {
            console.log('Component mounted.')
        }
    }
</script>
<template>
    <div class="page-wrapper chiller-theme toggled">
        <a id="show-sidebar" class="btn btn-sm btn-dark" href="#" @click="openmenu">
            <i class="fa fa-close"></i>
        </a>
        <addheader></addheader>

        <main class="page-content">

            <router-view/>
        </main>
        <addfooter></addfooter>
        <!-- page-content" -->
    </div>
    <!-- page-wrapper -->
</template>

<script>

    Vue.component('addheader',require('./header.vue').default);
    Vue.component('addfooter',require('./footer.vue').default);
    export default {
        mounted() {
            console.log('Component mounted.')
        },
        methods:{
            openmenu(){
                $(".page-wrapper").addClass("toggled");
            }
        }
    }
</script>
require('./bootstrap');

window.Vue = require('vue');

import VueRouter from 'vue-router'
Vue.use(VueRouter)
import Vue from 'vue';

const example = require('./components/ExampleComponent.vue').default;

const routes=[

    {
        path: '/',
        component: welcome,
        children: [
            {
                path: '/example',
                component: example
            },

        ]
    },


];
const router=new VueRouter({
    routes
});
const app = new Vue({
    el: '#app',
    router,
    data:{

    }
});
<!DOCTYPE html>
<html lang="{{ str_replace('_', '-', app()->getLocale()) }}">
    <head>
        <meta charset="utf-8">
        <meta name="viewport" content="width=device-width, initial-scale=1">

        <title>Laravel</title>

        <!-- Fonts -->
        <link href="https://fonts.googleapis.com/css?family=Nunito:200,600" rel="stylesheet">

        <!-- Styles -->
        <style>
            html, body {
                background-color: #fff;
                color: #636b6f;
                font-family: 'Nunito', sans-serif;
                font-weight: 200;
                height: 100vh;
                margin: 0;
            }

            .full-height {
                height: 100vh;
            }

            .flex-center {
                align-items: center;
                display: flex;
                justify-content: center;
            }

            .position-ref {
                position: relative;
            }

            .top-right {
                position: absolute;
                right: 10px;
                top: 18px;
            }

            .content {
                text-align: center;
            }

            .title {
                font-size: 84px;
            }

            .links > a {
                color: #636b6f;
                padding: 0 25px;
                font-size: 13px;
                font-weight: 600;
                letter-spacing: .1rem;
                text-decoration: none;
                text-transform: uppercase;
            }

            .m-b-md {
                margin-bottom: 30px;
            }
        </style>
    </head>
    <body>
        <div class="flex-center position-ref full-height">
            @if (Route::has('login'))
                <div class="top-right links">
                    @auth
                        <a href="{{ url('/home') }}">Home</a>
                    @else
                        <a href="{{ route('login') }}">Login</a>

                        @if (Route::has('register'))
                            <a href="{{ route('register') }}">Register</a>
                        @endif
                    @endauth
                </div>
            @endif
    </body>
</html>
@extends('layouts.app')

@section('content')
    <router-view></router-view>
@endsection
10.Run command npm run watch.
npm run dev active and updates only when you run command.
npm run watch does the same, but then it stays active and "watches" for updates.vue and .js files. If it detects a change so you can just refresh the page.
11.Now run below url in google chrome.
http://localhost/blog/public/