
 Posted By
Bajarangi soft ,
Posted On 10-09-2020
Posted By
Bajarangi soft ,
Posted On 10-09-2020
Create another class named as AlertWithIcon extends with StatefulWidget. In this class we would call the AlertWithIconWidget class using createState() method. This method would enable the mutable state management.
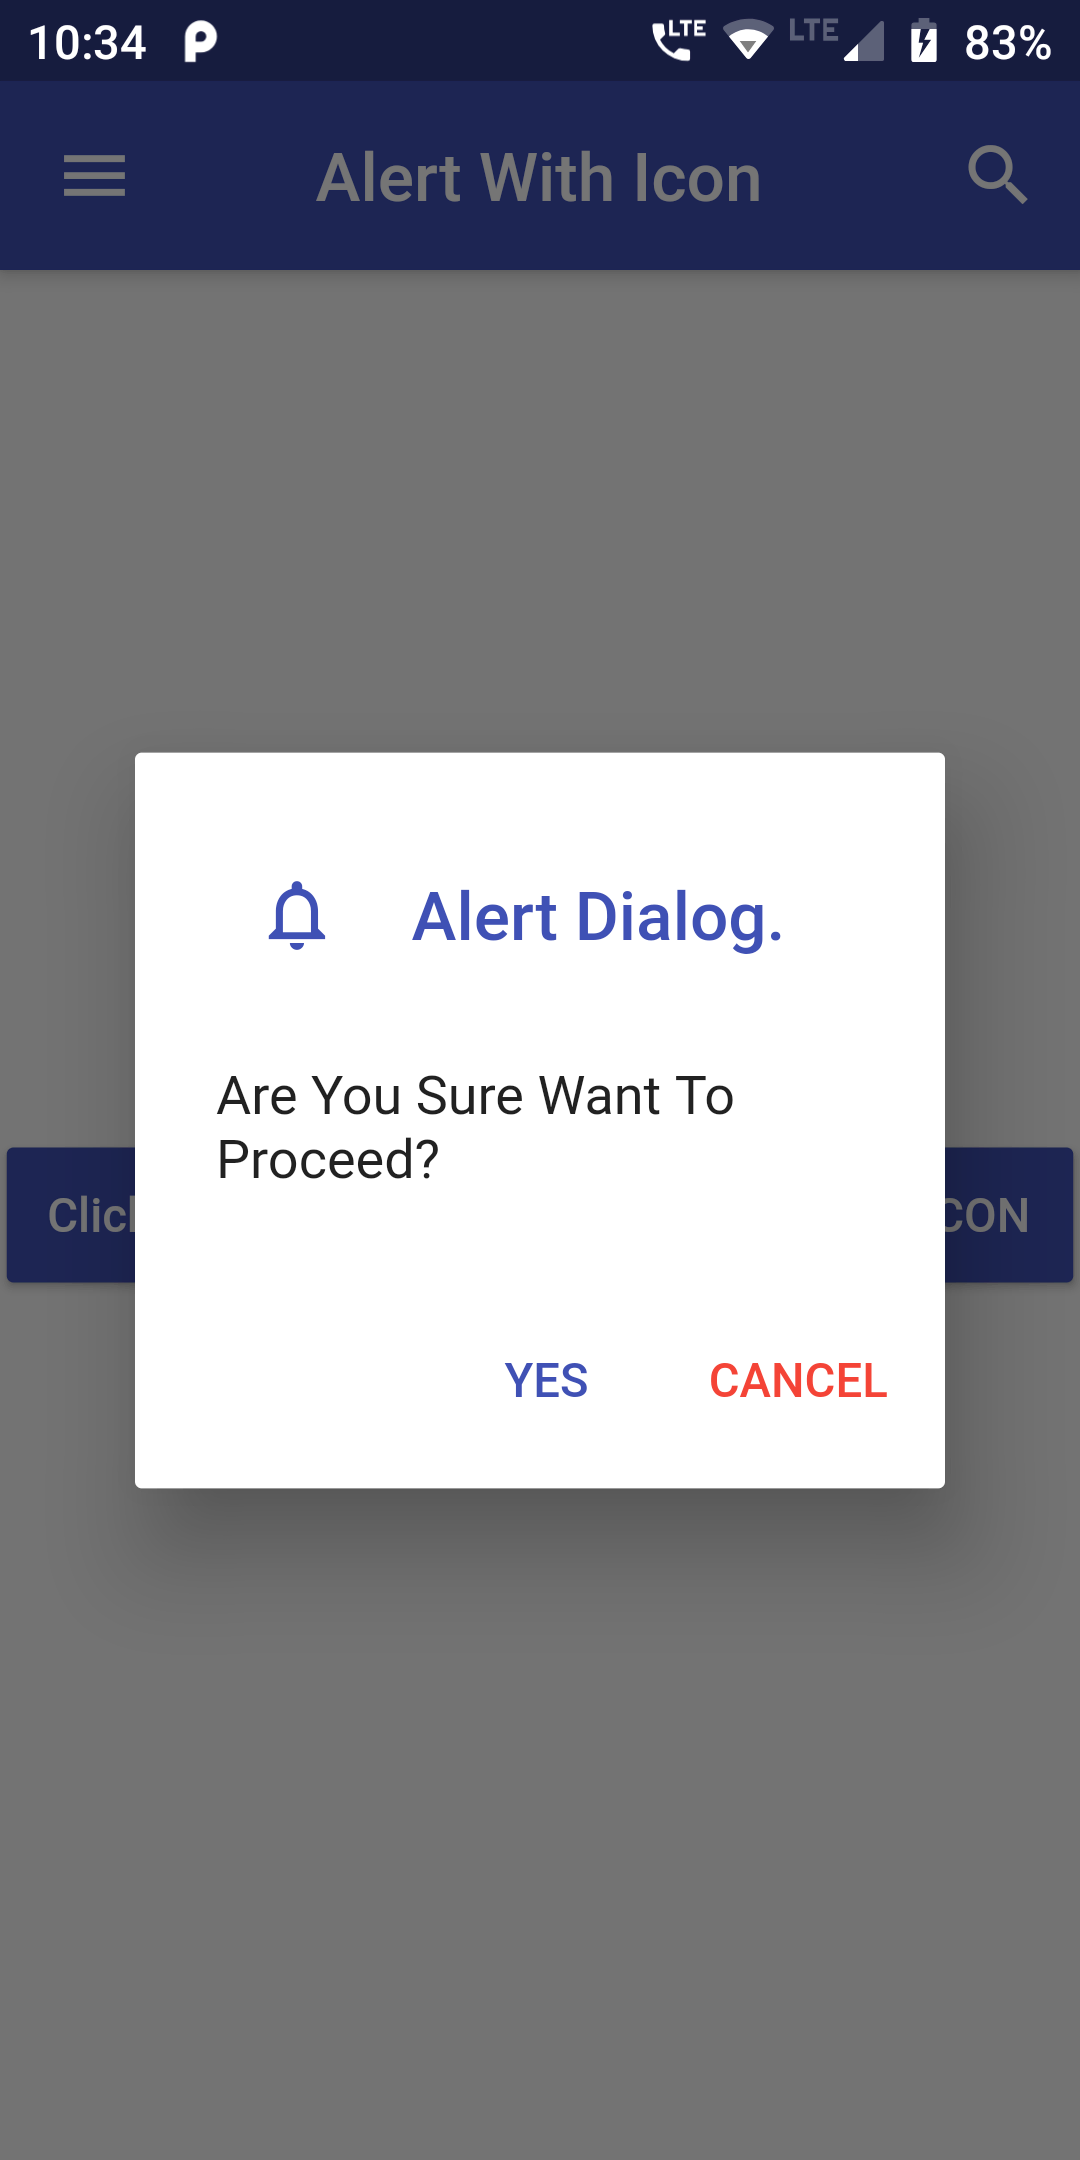
YOu Can add AlertWithIcon Dialog BOx Code:
AlertDialog(
  title: Row(
      children:[
        IconButton(icon: Icon(Icons.notifications_none,size: 25,color: Colors.indigo,),onPressed: () {},),
        Text('  Alert Dialog.',style: TextStyle(color:Colors.indigo),)
      ]
  ),
  content: Text("Are You Sure Want To Proceed?"),
  actions: <Widget>[
    FlatButton(
      child: Text("YES",style: TextStyle(color:Colors.indigo),),
      onPressed: () {
        //Put your code here which you want to execute on Yes button click.
        Navigator.of(context).pop();
      },
    ),

    FlatButton(
      child: Text("CANCEL",style: TextStyle(color:Colors.red),),
      onPressed: () {
        //Put your code here which you want to execute on Cancel button click.
        Navigator.of(context).pop();
      },
    ),
  ],
);
import 'package:flutter/material.dart';

void main() => runApp(MyApp());

class MyApp extends StatelessWidget {

  @override
  Widget build(BuildContext context) {
    return MaterialApp(
      debugShowCheckedModeBanner: false,
        home: Scaffold(
          appBar: AppBar(
            centerTitle: true,
            backgroundColor: Colors.indigo,
            leading: Icon(Icons.menu),
            title: Text("Alert With Icon"),
            actions: <Widget>[
              IconButton(icon: Icon(Icons.search),onPressed: () {},),
            ],
          ),
            body: Center(
                child: AlertWithIcon()
            )
        )
    );
  }
}

class AlertWithIcon extends StatefulWidget {

  AlertWithIconWidget createState() => AlertWithIconWidget();

}

class AlertWithIconWidget extends State {

  showAlert(BuildContext context) {
    showDialog(
      context: context,
      builder: (BuildContext context) {
        return AlertDialog(
          title: Row(
              children:[
                IconButton(icon: Icon(Icons.notifications_none,size: 25,color: Colors.indigo,),onPressed: () {},),
                Text('  Alert Dialog.',style: TextStyle(color:Colors.indigo),)
              ]
          ),
          content: Text("Are You Sure Want To Proceed?"),
          actions: <Widget>[
            FlatButton(
              child: Text("YES",style: TextStyle(color:Colors.indigo),),
              onPressed: () {
                //Put your code here which you want to execute on Yes button click.
                Navigator.of(context).pop();
              },
            ),

            FlatButton(
              child: Text("CANCEL",style: TextStyle(color:Colors.red),),
              onPressed: () {
                //Put your code here which you want to execute on Cancel button click.
                Navigator.of(context).pop();
              },
            ),
          ],
        );
      },
    );
  }

  @override
  Widget build(BuildContext context) {
    return Scaffold(
      body: Center(
        child:
        RaisedButton(
          onPressed: () => showAlert(context),
          child: Text('Click Here To Show Alert Dialog Box with ICON'),
          textColor: Colors.white,
          color: Colors.indigo,
          padding: EdgeInsets.fromLTRB(12, 12, 12, 12),
        ),
      ),
    );
  }
}