The transition property is a shorthand property for the four transition properties:
transitiontransition-delaytransition-durationtransition-propertytransition-timing-function Always specify the transitionDuration property, otherwise the duration is 0, and the transition will have no effect.
Syntax and Usage
Return the transition property:
object.style.transition

Set the transition property:
object.style.transition = "property duration timing-function delay|initial|inherit"
Property Values
| Value | Description |
|---|---|
| transitionProperty | Specifies the name of the CSS property the transition effect is for |
| transitionDuration | Specifies how many seconds or milliseconds the transition effect takes to complete |
| transitionTimingFunction | Specifies the speed curve of the transition effect |
| transitionDelay | Defines when the transition effect will start |
| initial | Sets this property to its default value. |
| inherit | Inherits this property from its parent element. |
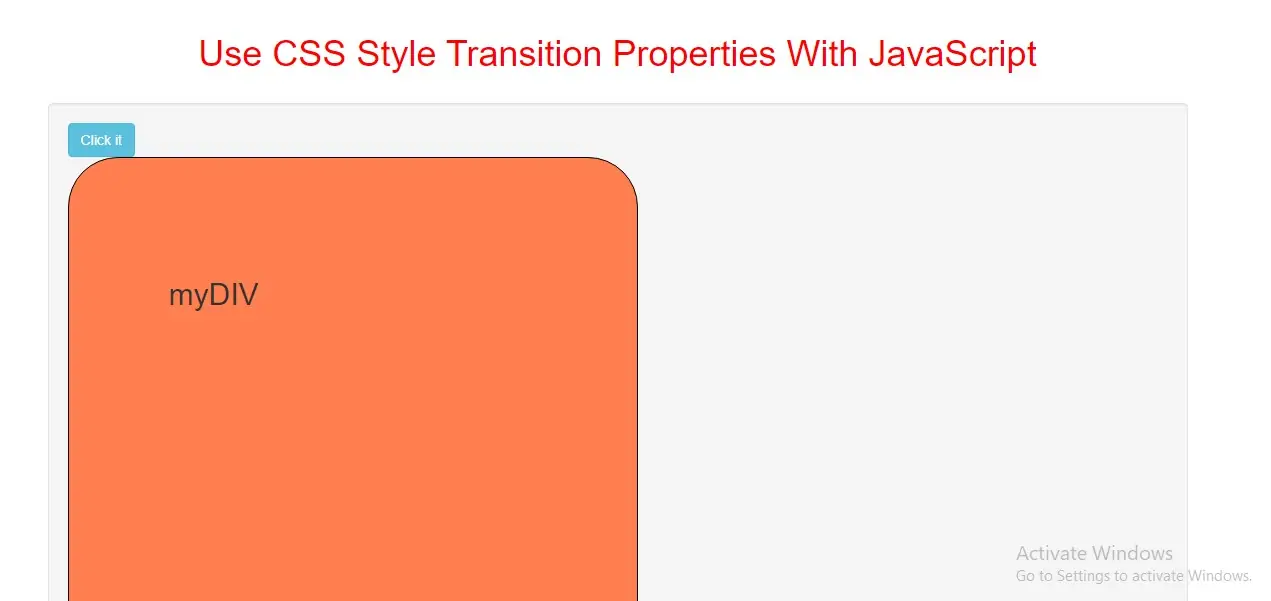
Example(1)
<style>
    #DIV {
        border: 1px solid black;
        background-color: lightblue;
        width: 270px;
        height: 200px;
        overflow: auto;
    }
    #DIV:hover {
        background-color: coral;
        width: 570px;
        height: 500px;
        padding: 100px;
        border-radius: 50px;
    }
</style>
<button class="btn btn-info" onclick="max_function()">Click it</button>
<div id="DIV">
    <h1>myDIV</h1>
</div>
<script>
    function max_function() {
        document.getElementById("DIV").style.transition = "all 2s";
    }
</script>
In above example when you click the "Click it" button and mouse over the DIV element again. The change will now happen gradually, like an animation.
Example(2)
Style transitionDelay Property
<style>
    #DIV {
        border: 1px solid black;
        background-color: lightblue;
        width: 270px;
        height: 200px;
        overflow: auto;
        transition: all 5s;
    }

    #DIV:hover {
        background-color: cornflowerblue;
        width: 570px;
        height: 500px;
        padding: 100px;
        border-radius: 50px;
    }
</style>
<button class="btn btn-info" onclick="change()">Click it</button>

<div id="DIV">
    <h1>myDIV</h1>
</div>

<script>
    function change() {
        document.getElementById("DIV").style.transitionDelay = "2s";
    }
</script>
In above example when you click the "Click it" button and mouse over the DIV element again. The changes will now wait 2 seconds before happening.
Example(3)
Style transitionDuration Property
<style>
    #DIV {
        border: 1px solid black;
        background-color: lightblue;
        width: 270px;
        height: 200px;
        overflow: auto;
        transition: all 5s;
    }

    #DIV:hover {
        background-color: cornflowerblue;
        width: 570px;
        height: 500px;
        padding: 100px;
        border-radius: 50px;
    }
</style>

<button class="btn btn-info" onclick="change()">Click it</button>

<div id="DIV">
    <h1>myDIV</h1>
</div>

<script>
    function change() {
        document.getElementById("DIV").style.transitionDuration = "1s";
    }
</script>
In above example when you click the "Click it" button and mouse over the DIV element again. The changes will now happen much faster!
Example(4)
Style transitionProperty Property
<style>
    #DIV {
        border: 1px solid black;
        background-color: lightblue;
        width: 270px;
        height: 200px;
        overflow: auto;
        transition: all 2s;
    }

    #DIV:hover {
        background-color: coral;
        width: 570px;
        height: 500px;
        padding: 100px;
        border-radius: 50px;
    }
</style>

<button class="btn btn-info" onclick="change()">Try it</button>

<div id="DIV">
    <h1>myDIV</h1>
</div>

<script>
    function myFunction() {
        document.change("DIV").style.transitionProperty = "width, height";
    }
</script>
In above example when you click the "Click it" button and mouse over the DIV element again. The changes will still happen, but only the width and height will change gradually.
Example(5)
Style transitionTimingFunction Property
<style>
    #DIV {
        border: 1px solid black;
        background-color: lightblue;
        width: 270px;
        height: 200px;
        overflow: auto;
        transition: all 5s;
    }

    #DIV:hover {
        background-color: cornflowerblue;
        width: 570px;
        height: 500px;
        padding: 100px;
        border-radius: 50px;
    }
</style>


<button class="btn btn-info" onclick="change()">Click it</button>

<div id="DIV">
    <h1>myDIV</h1>
</div>

<script>
    function change() {
        document.getElementById("DIV").style.transitionTimingFunction = "linear";
    }
</script>
In above example when you click the "Click it" button and mouse over the DIV element again. The changes will now happen in a linear speed curve.
Complete Code For CSS Style Transition Properties With JavaScript
<!DOCTYPE html>
<html>
<head>
    <title>Use CSS Style Transition Properties With JavaScript</title>
    <meta charset="utf-8">
    <meta name="viewport" content="width=device-width, initial-scale=1">
    <link rel="stylesheet" href="https://maxcdn.bootstrapcdn.com/bootstrap/3.4.1/css/bootstrap.min.css">
</head>
<style>
    h1 {
        color: red;

    }
    #DIV {
        border: 1px solid black;
        background-color: lightblue;
        width: 270px;
        height: 200px;
        overflow: auto;
    }

    #DIV:hover {
        background-color: coral;
        width: 570px;
        height: 500px;
        padding: 100px;
        border-radius: 50px;
    }
</style>

<body>
<div class="container">
    <br>
    <div class="text-center">
        <h1>Use CSS Style Transition Properties With JavaScript</h1>
    </div>
    <br>

   <div class="well">
       <button class="btn btn-info" onclick="max_function()">Click it</button>

       <div id="DIV">
           <h2>myDIV</h2>
       </div>

       <script>
           function max_function() {
               document.getElementById("DIV").style.transition = "all 2s";
           }
       </script>
   </div>
</body>
</html>