
 Posted By
Bajarangi soft ,
Posted On 01-10-2022
Posted By
Bajarangi soft ,
Posted On 01-10-2022
Step 1:Create a table and model for Multiple Image Uploading.
<html>
<head>
<meta name="viewport" content="width=device-width, initial-scale=1">
<title>Dropzone</title>
<script src="https://ajax.googleapis.com/ajax/libs/jquery/2.2.0/jquery.min.js"></script>
<link rel="stylesheet" href="https://maxcdn.bootstrapcdn.com/bootstrap/3.3.6/css/bootstrap.min.css" />
<link rel="stylesheet" href="https://cdnjs.cloudflare.com/ajax/libs/dropzone/5.5.1/dropzone.css" />
<script src="https://cdnjs.cloudflare.com/ajax/libs/dropzone/5.5.1/dropzone.js"></script>
</head>
<body>
<div class="container-fluid">
<br />
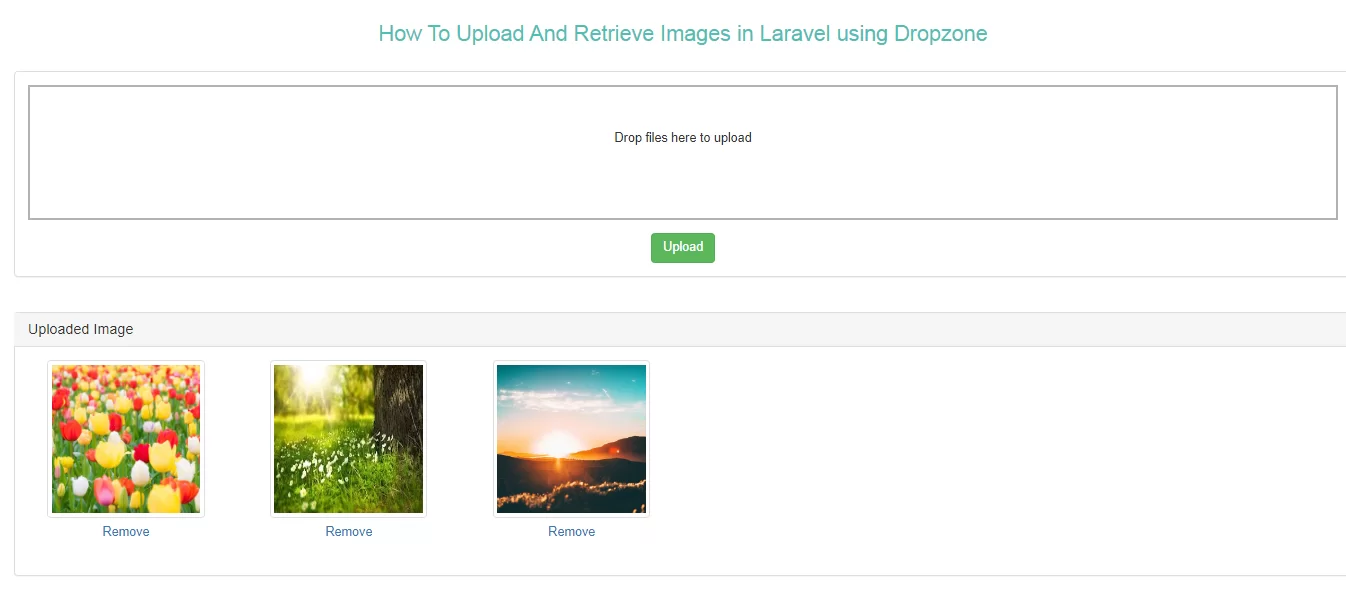
<h3 align="center" style="color: #4dc0b5">How To Upload And Retrieve Images in Laravel using Dropzone</h3>
<br />
<div class="panel panel-default">
<div class="panel-body">
<form id="dropzoneForm" class="dropzone" action="{{ route('dropzone.upload') }}">
@csrf
</form>
<div align="center">
<button type="button" class="btn btn-success" id="submit-all">Upload</button>
</div>
</div>
</div>
<br />
<div class="panel panel-default">
<div class="panel-heading">
<h3 class="panel-title">Uploaded Image</h3>
</div>
<div class="panel-body" id="uploaded_image">
</div>
</div>
</div>
</body>
</html>
<script type="text/javascript">
Dropzone.options.dropzoneForm = {
autoProcessQueue : false,
acceptedFiles : ".png,.jpg,.gif,.bmp,.jpeg",
init:function(){
var submitButton = document.querySelector("#submit-all");
myDropzone = this;
submitButton.addEventListener('click', function(){
myDropzone.processQueue();
});
this.on("complete", function(){
if(this.getQueuedFiles().length == 0 && this.getUploadingFiles().length == 0)
{
var _this = this;
_this.removeAllFiles();
}
load_images();
});
}
};
load_images();
function load_images()
{
$.ajax({
url:"{{ route('dropzone.fetch') }}",
success:function(data)
{
$('#uploaded_image').html(data);
}
})
}
$(document).on('click', '.remove_image', function(){
var name = $(this).attr('id');
$.ajax({
url:"{{ route('dropzone.delete') }}",
data:{name : name},
success:function(data){
load_images();
}
})
});
</script>
function upload(Request $request)
{

    $image = $request->file('file');
    $imageName = $image->getClientOriginalName();
    $destinationPath = public_path('/images/');
    $image->move($destinationPath,$imageName);

    $imagemodel= new Dropzone();
    $imagemodel->image="$imageName";
    $imagemodel->save();
    return response()->json(['success'=>$imageName,
        'message' => 'Images Saved Successfully..']);
}

function fetch()
{
    $images = Dropzone::get();
    $output = '<div class="row">';
    foreach($images as $image)
    {
        $output .= '
  <div class="col-md-2" style="margin-bottom:16px;" align="center">
            <img src="'.asset('public/images/' . $image->image).'" class="img-thumbnail" width="175" height="175" style="height:175px;" />
            <button type="button" class="btn btn-link remove_image" id="'.$image->image.'">Remove</button>
        </div>
  ';
    }
    $output .= '</div>';
    echo $output;
}
Route::get('dropzone', 'DropzoneController@index');

Route::post('dropzone/upload', 'DropzoneController@upload')->name('dropzone.upload');

Route::get('dropzone/fetch', 'DropzoneController@fetch')->name('dropzone.fetch');