Let's Learn
1.Install Laravel New Project for that run below code in command prompt.
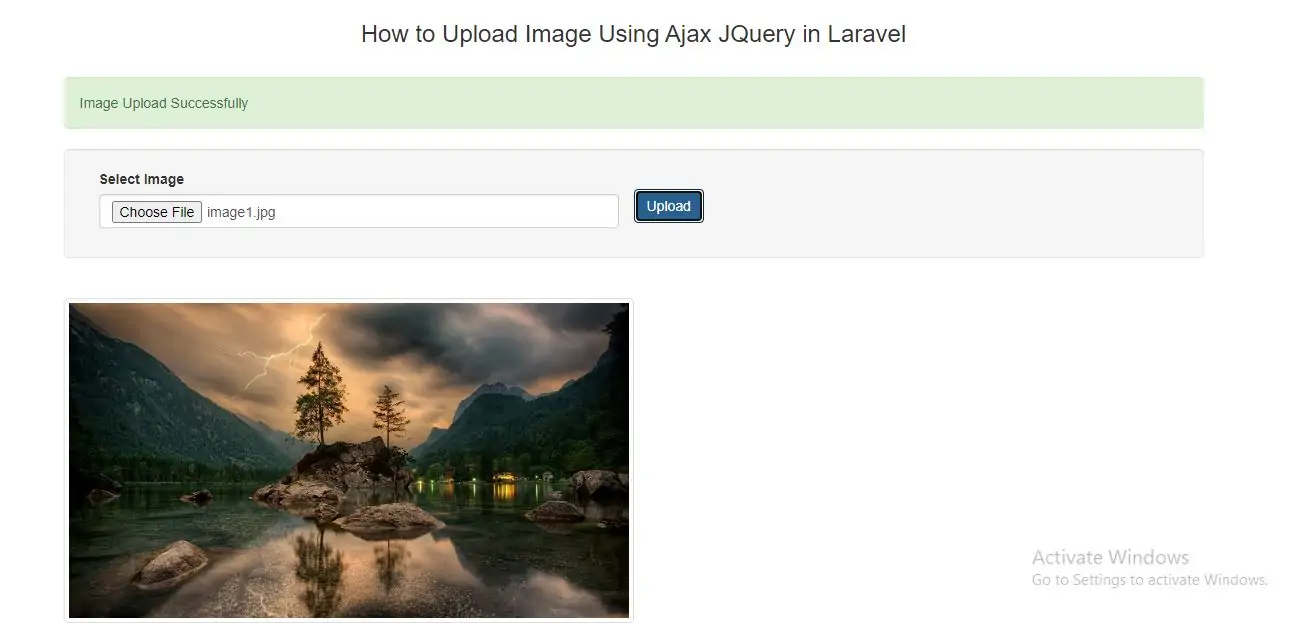
composer create-project --prefer-dist laravel/laravel Image_Upload
1. Write database name in .env file in project to connect between web page and database.
2. Run a below commands.
php aritsan make:auth
php aritsan migrate
2.Create blade file as image_upload in resource/view folder to upload image.
<!DOCTYPE html>
<html>
<head>
    <title>How to Upload Image Using Ajax JQuery in Laravel</title>
    <meta charset="utf-8">
    <meta name="viewport" content="width=device-width, initial-scale=1">
    <link rel="stylesheet" href="https://maxcdn.bootstrapcdn.com/bootstrap/3.4.1/css/bootstrap.min.css">
    <script src="https://ajax.googleapis.com/ajax/libs/jquery/3.5.1/jquery.min.js"></script>
    <script src="https://maxcdn.bootstrapcdn.com/bootstrap/3.4.1/js/bootstrap.min.js"></script></head>
</head>
<body>
<br />
<div class="container">
    <h3 align="center">How to Upload Image Using Ajax JQuery in Laravel</h3>
    <br />
    <div class="alert" id="message" style="display: none"></div>
    <div class="well">
        <form method="post" id="upload_form" enctype="multipart/form-data">
            {{ csrf_field() }}
            <div class="form-group">
                <div class="col-md-6">
                    <label>Select Image</label>
                    <input class="form-control" type="file" name="file" id="file" required/>
                </div>
                <br>
                <input type="submit" name="upload" id="upload" class="btn btn-primary" value="Upload">
            </div>
        </form>
    </div>
    <br />
    <span id="uploaded_image"></span>
</div>
</body>
</html>

<script>
    $(document).ready(function(){

        $('#upload_form').on('submit', function(event){
            event.preventDefault();
            $.ajax({
                url:"{{ url('upload') }}",
                method:"POST",
                data:new FormData(this),
                dataType:'JSON',
                contentType: false,
                cache: false,
                processData: false,
                success:function(data)
                {
                    $('#message').css('display', 'block');
                    $('#message').html(data.message);
                    $('#message').addClass(data.class_name);
                    $('#uploaded_image').html(data.uploaded_image);
                }
            })
        });

    });
</script>
3.Create controller to save image in folder.
php artisan make:controller UploadController
4.Implement code as below in UploadController
<?php

namespace App\Http\Controllers;

use Illuminate\Http\Request;
use Validator;

class UploadController extends Controller
{
    function index()
    {
        return view('image_upload');
    }

    function store(Request $request)
    {

        $input = $request->all();

        $this->validate($request, [

            'file' => 'required|image|mimes:jpeg,png,jpg,gif|max:2048'
        ]);
        $input = $request->except('file');
        if ($request->hasFile('file')) {
            $image = $request->file('file');
            $name = time() . '.' . $image->getClientOriginalExtension();
            $destinationPath = public_path('/images');
            $image->move($destinationPath, $name);
            $input['file'] = $name;
            return response()->json([
                'message' => 'Image Upload Successfully',
                'uploaded_image' => '<img src="/images/'.$name.'" class="img-thumbnail" width="300" />',
                'class_name' => 'alert-success'
            ]);

        }
        return response()->json([
            'message' => 'something went wrong',
            'uploaded_image' => '',
            'class_name' => 'alert-success'
        ]);
    }
}
?>
4.Create Route in web.php.
Route::get('/image_upload', 'UploadController@index');
Route::post('/upload', 'UploadController@store');
5.Create link to image_upload in app.blade.php
<li class="nav-item">
    <a class="nav-link" href="{{ url('image_upload') }}">Upload_image</a>
</li>